Hey there, fellow craft lovers and party planners! Let’s cut to the chase—if you’ve ever stared at a showstopping rhinestone cape on Instagram or TikTok and thought, “I wish I could make that,” this guide is for you. I’m not here to sell you some overpriced kit, though I am the owner of a flatback rhinestone supply shop, so I’ve spent my whole life geeking out over how to make these pieces look professional, not like a middle school craft project. I’ve made dozens of these capes for birthday girls, drag performers, festival goers, and even a few local bridesmaid entourages, and today I’m breaking down exactly how to pull it off without wasting hundreds of dollars on materials or messing up the most important part: the rhinestones. Flatback Rhinestones

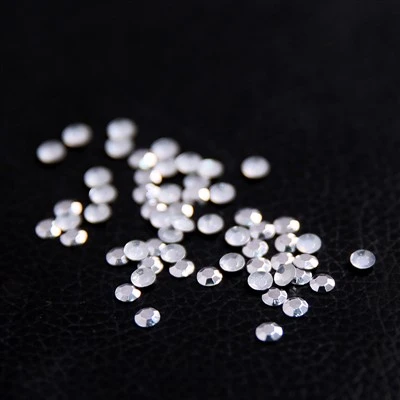
First, let’s talk about why flatback rhinestones are the only way to go for a cape. You might be wondering, “Why not use hotfix ones?” Great question. Hotfix rhinestones have a sticky adhesive on the back that melts when heated, perfect for small, precise areas like shoe bling or jacket patches. But a full cape? You’d spend hours with a tiny iron, and there’s a high chance the adhesive would fail when it rubs against clothing or gets brushed. Flatbacks, on the other hand, have a smooth, flat back that works with craft glue meant for fabric, and they’re way more flexible when you adhere them to mesh or tulle—two of the most common materials for cape bases. I stock a huge range of these flatbacks, from the classic clear cut (that catches light like crazy) to every color under the rainbow, and even iridescent ones that shift hue in sunlight, so you can tailor this project to whatever vibe you’re going for.
Now, let’s get to materials. I’ve made this list super specific, because I’ve skipped the cheap versions before and learned the hard way what works and what doesn’t. Let’s start with the base: 1 yard of 54-inch wide power mesh. Power mesh is stretchy, lightweight, and has a small enough weave that rhinestones don’t slip through, but it’s not so thick that it weighs your cape down. If you want something softer, tulle works too, but tulle is a little more prone to tearing, so power mesh is my go-to for durability. Next, adhesives: you need two types, trust me. A strong fabric glue (I recommend a permanent, flexible one like E6000, but craft-specific fabric glue works for beginners) and a bead sealer. Bead sealer is the unsung hero here—it keeps the rhinestones from falling off when the cape gets washed (though I always recommend spot cleaning, not tossing it in the machine) and prevents the adhesive from seeping out and making the rhinestones look cloudy. Then, your rhinestones: for a full-size cape, you’ll need about 10,000 to 12,000 flatback rhinestones. I suggest mixing sizes—6ss (tiny, 2mm) for fill, 10ss (3mm) for accents, and some 16ss (4mm) for focal points like on the shoulders or hem. Mixing sizes adds depth, makes the cape look more luxurious, and saves you money instead of buying all the largest ones. You’ll also need a few tools: a pair of sharp fabric scissors, a pencil or fabric marker that doesn’t bleed, a small paintbrush, tweezers (non-slip ones work best for picking up tiny rhinestones), and a paper plate or small tray to hold your rhinestones so they don’t get lost.
Wait a second—before you even touch a rhinestone, take 15 minutes to plan your design. I’ve seen people dive straight into gluing and end up with a lopsided mess, so plan first. First, decide the length of your cape: ankle-length is classic, but cropped (for festivals) or floor-length (for formal events) works too. For a standard ankle-length cape, the main body of the mesh will be 50 inches long, and we’ll add a 10-inch “neck strap” section at the top for tying. Next, your rhinestone pattern: do you want a full-coverage bling cape? That’s my personal favorite for events, but it’s more time-consuming. Or an ombre effect, where the rhinestones fade from dark at the top to light at the bottom? Or a pattern, like stars or hearts, cut out of plain mesh? For beginners, I recommend a full-coverage or ombre—they look professional, and you don’t have to worry about intricate patterns. If you’re doing ombre, lay all your rhinestones out by color: say, deep magenta at the top, fading to soft pink in the middle, to white at the bottom. That way, when you start gluing, you just work in sections and build the gradient.
Now, let’s get to the actual assembly, and this is where I’m going to share my pro tip that I learned from a customer who’s a professional drag queen: prep your mesh first. Lay your power mesh flat on a large, clean surface (a dining table or floor works, just cover it with a plastic tablecloth so glue doesn’t stick). If you’re doing ombre, lightly draw the gradient lines with a fabric marker—don’t press too hard, you’ll erase them later or they’ll be covered by rhinestones. Now, mix your glue and bead sealer: use a 1:1 ratio, so one part fabric glue, one part bead sealer. This makes the glue flexible, not stiff, which is crucial for a cape that moves with you. Stiff glue means the cape cracks when you walk, and rhinestones pop off. Trust me, I made that mistake on my first cape—wore it to a festival, and halfway through, the hem of the cape was covered in loose rhinestones. Never again.
Next, the gluing process. I know it’s tedious, but take your time—rushing leads to messy globs of glue. Start with the largest rhinestones first, since they are your focal points. Use tweezers to pick up a single rhinestone, dab the flat back gently into your glue mix, and place it on the mesh, pressing lightly for 2 to 3 seconds. Leave a small gap between each rhinestone so they don’t overlap—overlapping makes the cape look cluttered. Once all the large ones are placed, move to the medium 10ss rhinestones, filling in the gaps. Then the tiny 6ss ones to cover any remaining empty spaces. If you’re doing full coverage, you’ll want a single layer of rhinestones—don’t add a second layer, that’s too heavy. For the neck strap, skip the rhinestones there unless you want to, since that part ties around your neck and will rub against your skin. Once you’re done gluing, set the cape aside to dry for 24 hours in a cool, dry place—don’t hang it up while drying, that can make it sag.
Wait, what about the edges? A lot of people forget the edges of the mesh, and that’s where rhinestones can catch on hair or clothing and pop off. Once the main body is dry, run a line of glue along the entire outer edge of the cape (except the neck strap) and add a single row of medium rhinestones. That way, the raw mesh edge is covered, and no loose threads peek out.
Now, let’s talk about care, because I get questions about this all the time. If you need to clean your cape, spot clean only with a damp cloth and mild soap. Never soak it, never put it in a washing machine, never iron it—heat will melt the adhesive. If you lose a rhinestone over time, just use a tiny bit of fabric glue, dab a new flatback rhinestone on, and press it for a few seconds. That’s it, easy fix.
I’ve had so many customers share their finished capes with me, and it’s the best part of my job—from a bride who wore her white iridescent cape to her wedding reception, to a teen who made a rainbow cape for her school dance, to a festival goer who showed off her neon pink cape under blacklight. Each one is unique, and that’s the magic of making something with flatback rhinestones—you don’t have to be a professional to pull it off.
If you’re ready to stock up on flatback rhinestones for your own cape (or ten—no judgment, I’ve had customers buy multiple for different events), reach out to connect and chat through exactly what you need. Whether you’re a beginner trying your first project or a seasoned crafter looking for bulk supplies for a whole group, I can help you pick the right sizes, colors, and amounts to make your vision come to life, without wasting money on materials that don’t work.
Happy crafting, and can’t wait to see what you make.
Rhinestud References:
- Johnson, M. (2021). The Complete Guide to Craft Adhesives for Fabric and Embellishments. Craft Industry Press.
- Lee, S. (2022). Rhinestone Application Techniques for Performance Apparel. Textile Craft Quarterly.
- Patel, R. (2023). Durability of Flatback vs. Hotfix Rhinestones for Flexible Garments. Journal of Creative Material Science.
Huayue Diamond (Shandong) Arts & Crafts Co., Ltd.
As one of the most professional flatback rhinestones manufacturers and suppliers in China, we offer a wide range of products with superior quality. Please rest assured to wholesale custom made flatback rhinestones at competitive price from our factory. Contact us for more cheap products.
Address: Ruibo Fuel Yard, Yinping Town, Yicheng District, Zaozhuang City, Shandong Province
E-mail: 52655731@qq.com
WebSite: https://www.hotfixchina.com/
